Azure CI/CD iOS Integration
This guide helps you to apply the AppSealing SDK to a project managed by the Azure CI/CD tool. The types of projects that can be applied are Xcode default projects (Swift/Objective-C), Flutter projects, Ionic, Cordova, and React Native projects. The same preparation process is required for projects on all platforms, and the build script uses a different script for each platform.
⚠️ All platforms require the same preparation process. However, the build script differs per platform.
📋 Prepare Your Certificate and Profile
Section titled “📋 Prepare Your Certificate and Profile”For projects that have applied the AppSealing SDK, the re-signing process is performed at the stage of executing the generate_hash script after the IPA is exported. Therefore, the distribution certificate, private key, and distribution provisioning profile used for the initial IPA signing are required, and these files must be prepared and added to the folder of the source code repository.
🔐 App Store Distribution Certificate
Section titled “🔐 App Store Distribution Certificate”How to create a certificate P12 file in the Mac Keychain app
Section titled “How to create a certificate P12 file in the Mac Keychain app”-
In the Mac’s launchpad, go to Other Items and you will find the “Keychain Access” app. Run this app and when you see the screen below, select the “login” item from the left tab.
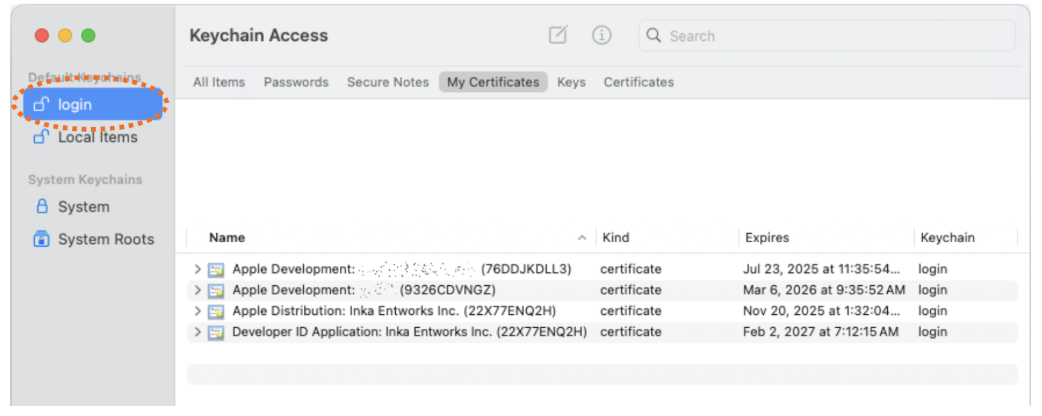
-
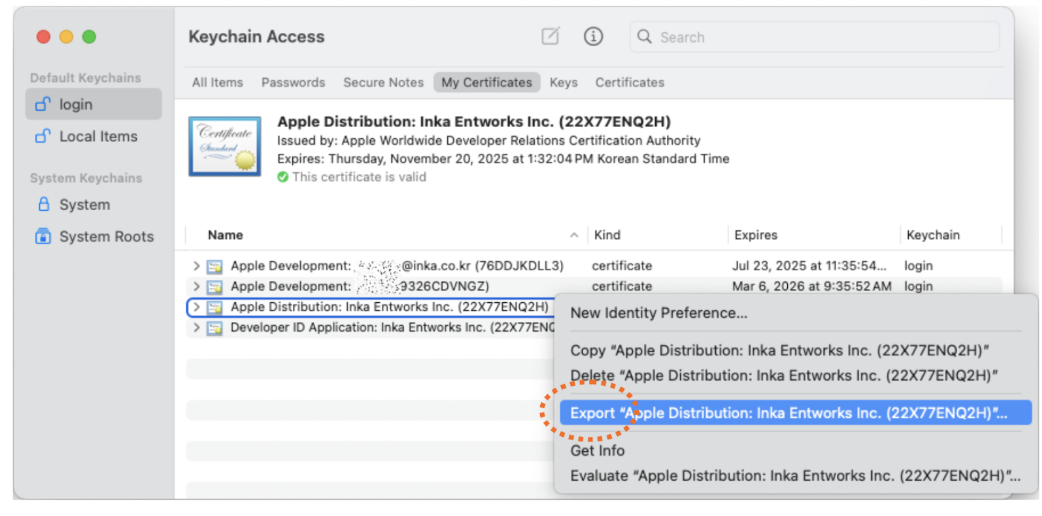
Select “My Certificates” from the top tab menu in the right pane and select the distribution certificate registered in your keychain.
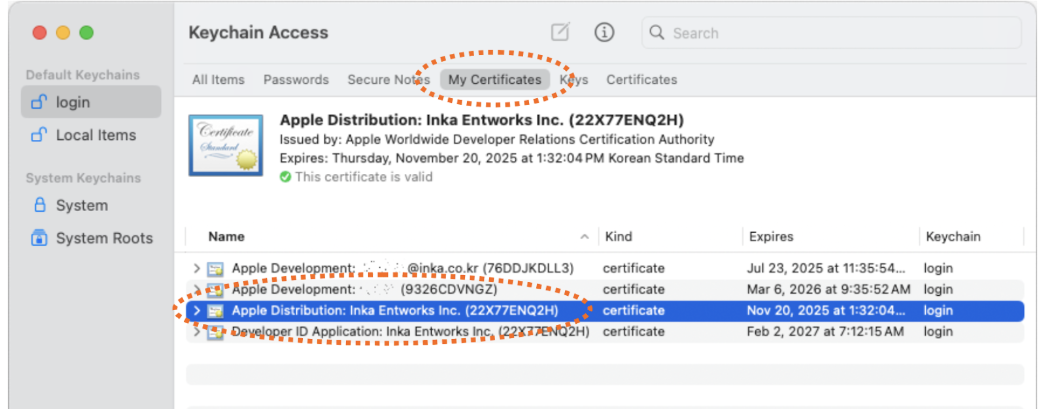
-
After selecting the certificate, right-click to display the context menu and select “Export…”.
-
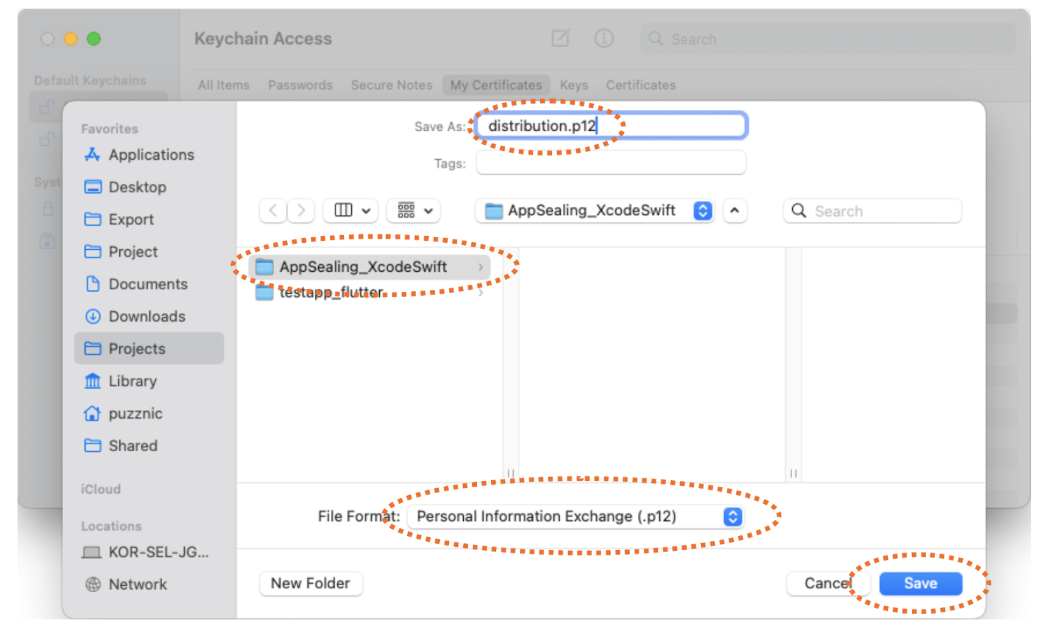
Select the save location as the project folder, the file name as “distribution.p12”, and the file format as “Personal Information Exchange (.p12)”
-
Click the Save button and enter the password in the dialogue box. Make sure to write down the password you enter here, as you will need to register it in the variables of your Azure project in next steps.
Provisioning Profile for App Store Distribution
Section titled “Provisioning Profile for App Store Distribution”The project folder must contain a provisioning profile for App Store distribution. This file must contain the profile downloaded from the Apple Developer site with the name “profile.mobileprovision”. If the file name is incorrect or the profile is not correct, re- signing may fail or the app may not install/run properly.
Before adding the certificate and profile to the project and pushing it to the source code repository, perform the following steps first. After completing all the steps up to the final step, you must push it to the repository so that the Azure pipeline builds normally.
⚙️ Setting Up an Azure DevOps Project
Section titled “⚙️ Setting Up an Azure DevOps Project”In this step, we will go through the settings related to the Azure project. You can do the same process for all projects regardless of the platform of the project.
-
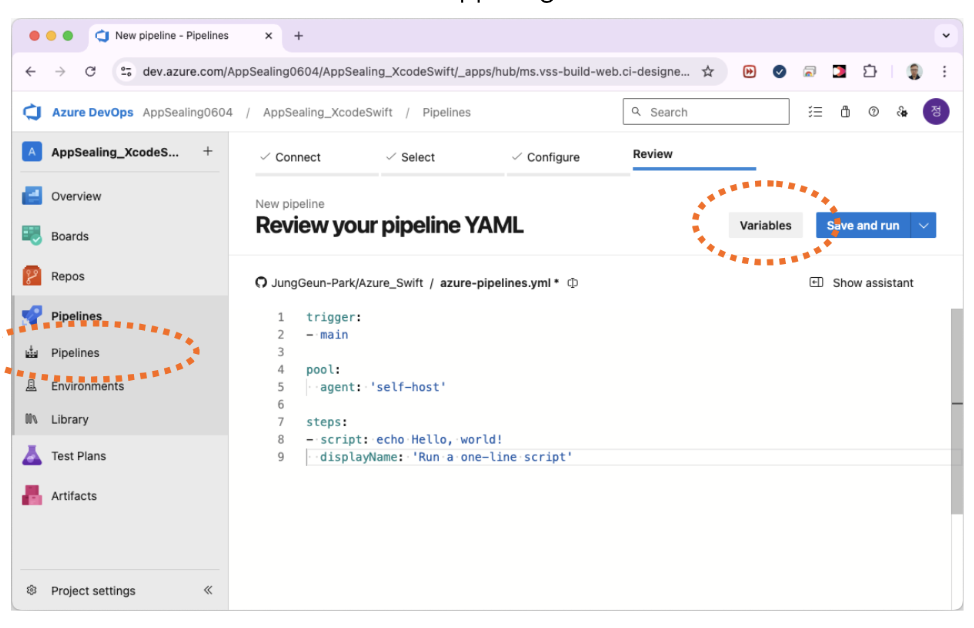
Go to the project screen on the Azure DevOps page, select the currently active Pipelines, and click the “Variables” button in the upper right corner.
-
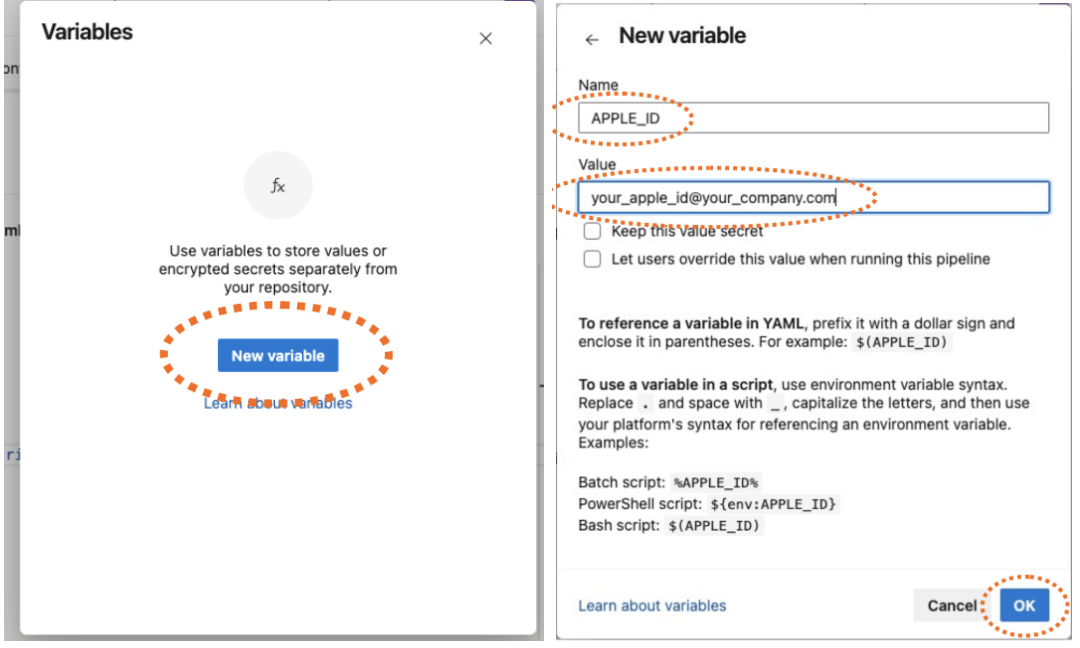
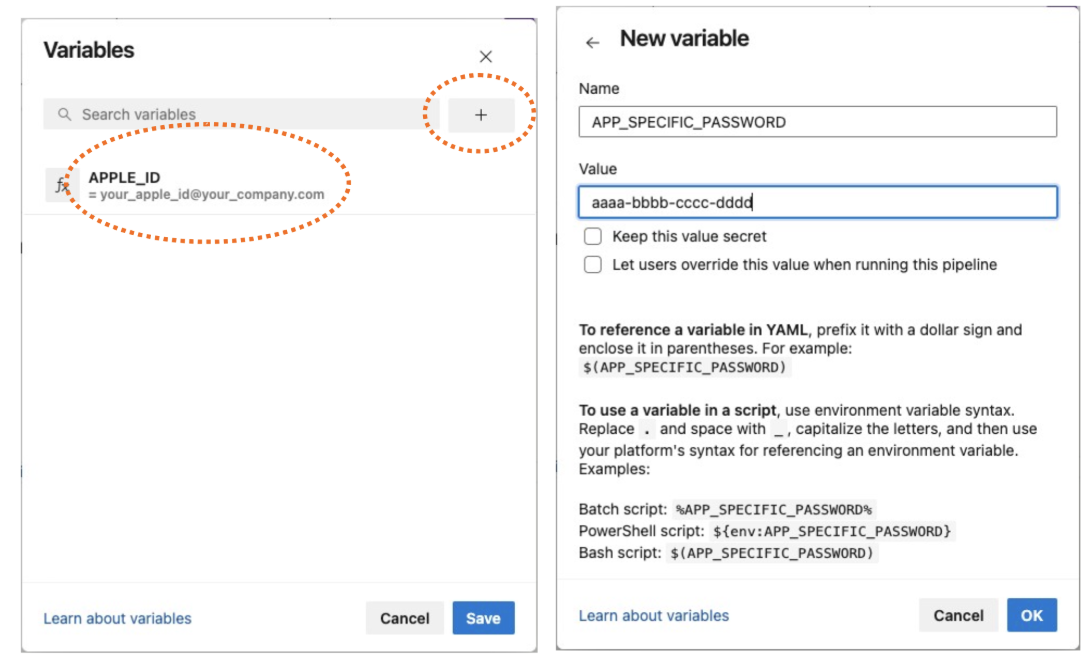
Click on “New Variables” to add the “Name” and “Value”. Add “APPLE_ID” in the “Name” field and enter the ID value of the Apple account you are actually using in the “Value” field. Then click the “OK” button.
-
You can see that the “APPLE_ID” variable has been registered. Now, click the “+” button again to add a new variable. Enter the string “APP_SPECIFIC_PASSWORD” in the “Name” field and enter the actual app-specific password value you are using in the “Value” field.
-
It is recommended that you hide both the APP_SPECIFIC_PASSWORD and any CERTIFICATE_PASSWORD for that enable “Keep the value secret”
-
-
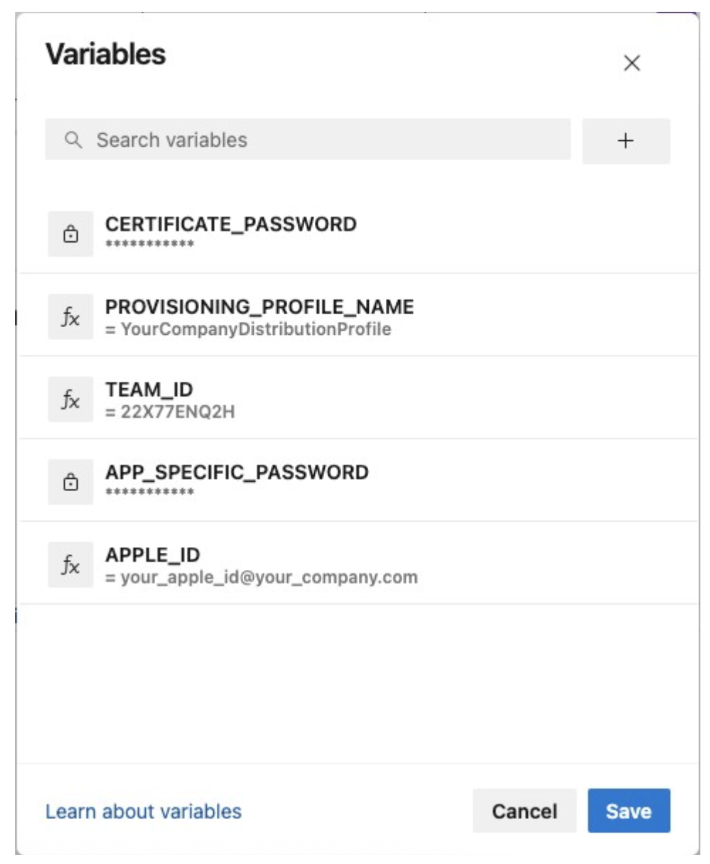
In the same way, add three more variables: TEAM_ID, PROVISIONING_PROFILE_NAME, CERTIFICATE_PASSWORD. PROVISIONING_PROFILE_NAME value specifies the name of the provisioning profile used to deploy the app. Once all variables are entered, you should finally see a screen similar to the below one.
🛠️ Modify Azure Build Script
Section titled “🛠️ Modify Azure Build Script”We can modify the script directly in the Azure pipeline editing window, as shown in the screen below, or push the modified script to the source repository.
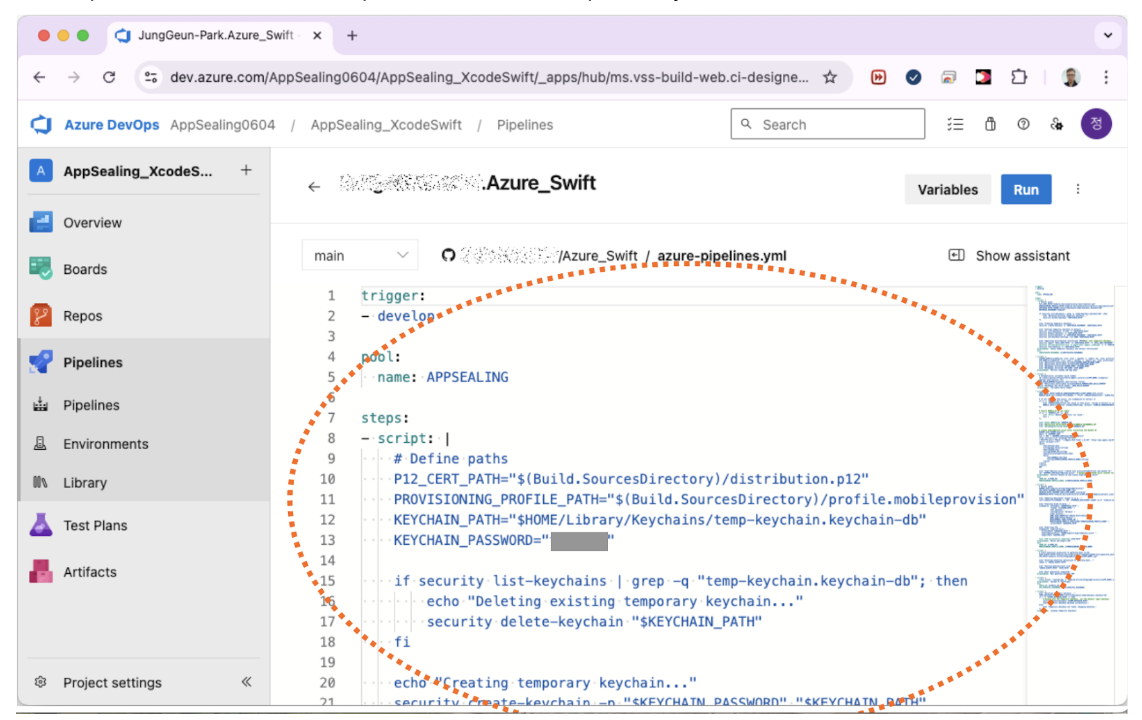
Replace the existing YML script content with the YML shared in the bundle and push the code. However, in the YML, you must change the branch name corresponding to “trigger” and the agent pool name for the pipeline build to the names you are actually using. If your project is based on Flutter, Ionic, Cordova, or React Native platforms, you should use the platform-specific script code included in the AzureScrpts.txt file in the SDK instead of the script below.
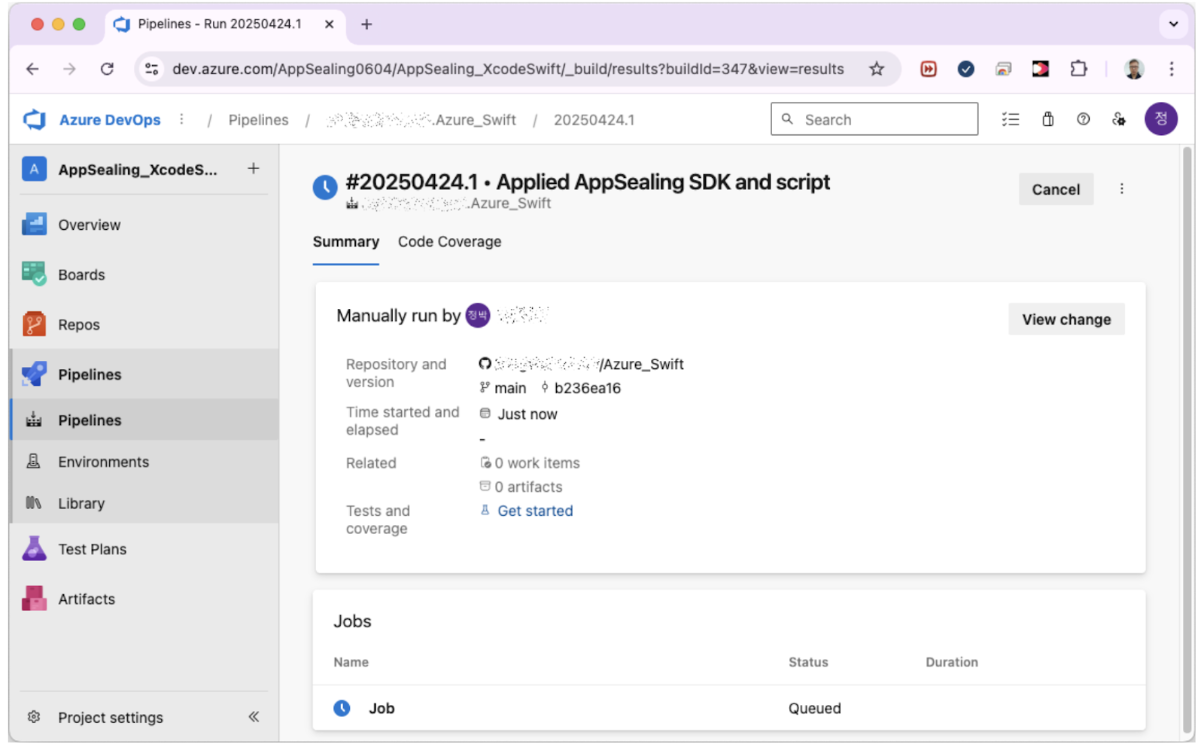
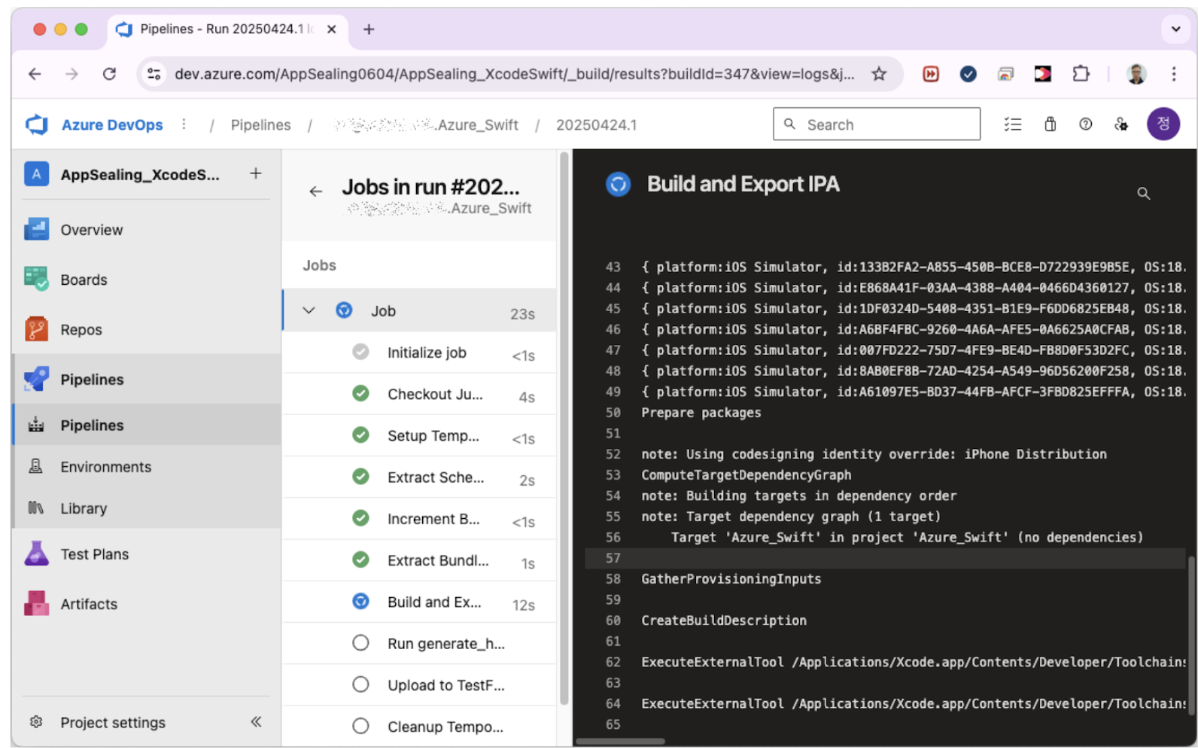
After modifying the YML script and pushing the code, the build will proceed as shown in the screen below with the AppSealing SDK applied.