Enhanced Jailbreak Detection Using App Server
Necessity of Enhanced Jailbreak Detection Method
Section titled “Necessity of Enhanced Jailbreak Detection Method”One of the main functions within DoveRunner Mobile App Security SDK is detecting the environment of the jailbroken device and forcibly closes the app. However, there is a possibility that these detection functions will be bypassed by more sophisticated attack methods. This is because, due to the characteristics of the iOS operating system, the code of the loaded dynamic library (dylib) is executed first when the app is launched. An attacker may distribute the code to patch a specific area of the executable file in such a dynamic library.
If this code patch occurs before DoveRunner Mobile App Security’s detection logic is executed, the code that terminates the app has been removed, so even if a jailbreak is detected, the app will remain running.
Of course, not everyone can perform this type of attack easily, but since this type of attack has been confirmed by a group of hackers with specialized hacking knowledge, DoveRunner Mobile App Security provides an additional jailbreak detection method to overcome such an attack situation.
Since the characteristic of this attack method is to change the code of the running app in advance, no matter how strong detection logic is added to the DoveRunner Mobile App Security library itself, the situation in which the code is patched by the dynamic library is unavoidable. Therefore, the newly provided jailbreak detection function does not detect in the app, but in a way that rejects all services and actions, such as log-in in or accepting API calls, in the case of a terminal suspected of being jailbroken in the server linked to the app.
The basic method is to obtain server credentials from the app through the DoveRunner Mobile App Security interface, add them to the existing authentication parameters, and send them to the server.
This method cannot be applied for a client-only app that does not work with the server.
The following sections describe, with example code, how to obtain and validate server credentials.
iOS App Code
Section titled “iOS App Code”in the DoveRunner Mobile App Security SDK to get the server credential string and send it to the server along with the existing authentication parameters.
Most apps that work with the server will go through a user authentication or login process, and in this process, the account information entered by the user will be transmitted to the server. You can add the server credential string to the parameters you send to the server.
The server credential string is obtained in the following way:
Simple UI code into ‘ViewController.swift’ for Swift project
func userLogin( userID: String, password: String ) -> Bool{ let inst: AppSealingInterface = AppSealingInterface();let appSealingCredential = String.init( cString: inst._GetEncryptedCredential() ); // credential 값을 인증 정보와 함께 서버로 올린다 let loginResult = processLogin( user: userID, pwd: password, credential: appSealingCredential ); ... ...}Simple UI code into ‘ViewController.mm’ for Objective-C project
- (BOOL)userLogin:(NSString*)userID withPassword:(NSString*)password{ char _appSealingCredential[290] = { 0, }; ObjC_GetEncryptedCredential( _appSealingCredential );// credential 값을 인증 정보와 함께 서버로 올린다 BOOL loginResult = processLogin( userID, password, _appSealingCredential ); ... ...}If your server fails to validate credential, you should also force the login to fail and the app to not proceed further. However, since code such as checking the login result and closing the app is likely to be tampered by an attacker, the best practice is configuring your server to deny service or response for any requests from that client after the server fails credential validation.
This will be discussed again in the next section.
Verification at app server
Section titled “Verification at app server”The credential data (hex string) returned from the interface call to the DoveRunner Mobile App Security module is only valid when the security logic inside DoveRunner Mobile App Security is normally performed and no dangerous situation is detected in the device.
If code patch attack is made through the dynamic library or the security logic is bypassed by other methods, valid credential data will not be generated, so the server should verify this value and blocks the attack situation of the device.
The app server must check whether the credential value sent by the client (app) is correct, and if it is not correct, it must deny authentication (login) and then deny any services (API call) requested by that client.
[Preparation]
Section titled “[Preparation]”To verify credential data on the server, you need an AES Key and IV to decrypt the data sent from the client, and the original credential data to compare and verify.
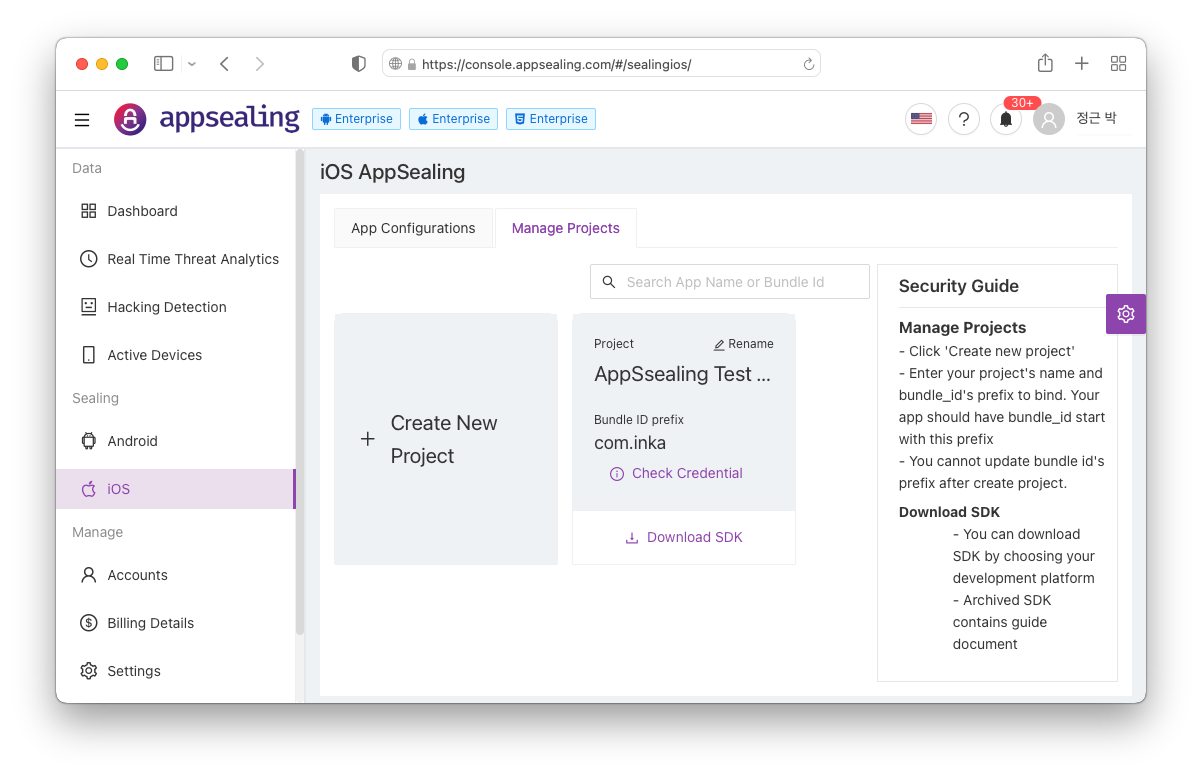
All of these values can be acquired through the “Check Credential” button of the project in the ADC. Just copy the Hex string shown here and paste it into the example code and use it. First, connect to ADC as shown in the screen below and click the “Check Credential” button in the project box.
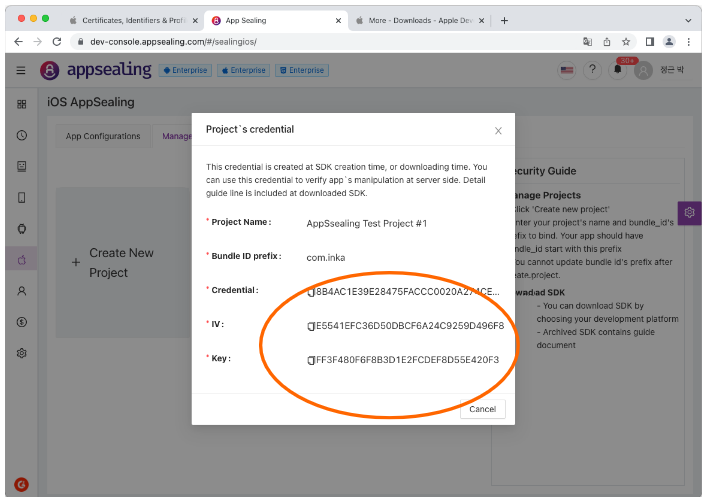
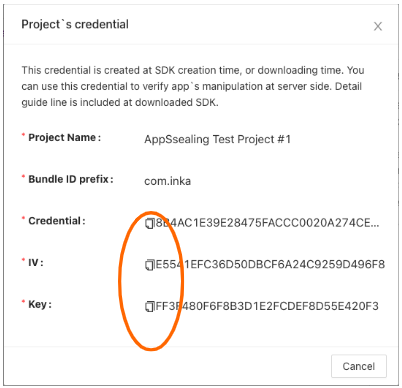
If you click the button, the following window is displayed, where you can check the Credential value and IV and key to be used for decryption. You can use the copy button to the left of the string to copy this value as it is, paste it into the server-side
If you click the button, the following window is displayed, where you can check the Credential value and IV and AES key to be used for decryption. You can use the copy button to the left of the string to copy this value as it is, paste it into the server-side verification code and use it.
[In case your server code is using Node.js/Javascript]
Add following code to your existing code and use it for credential data validation. Authenticity can be determined by passing the credential value sent as a parameter in the login or authentication function of the existing server code to the verfityAppSealingCredential function provided in the code below. (The code below is also included in the SDK as a file named appsealing_credential.js).
** Note: In the code below, ORG_CREDENTIAL, AES_IV, and AES_KEY must be replaced with values obtained through the “Check Credential” function of the corresponding project in the ADC. If you just take the example code and use it intactly, credential value will not be verified properly.
var crypto = require('crypto');
function verifyAppSealingCredential( credential ){  // Need to Change : Get From ADC (via 'Check Credential') -----------------------------------------  const ORG_CREDENTIAL = "572E0E1459453F2078D6576FF71ECD0DBCA0484430C7FA7FE45B788A37DE3A04204F5A55FEA83AC9AFBA2C688594F75A3828B23972DB34858EC4F6CC3202533E44121E5F2614B227E18B6419A83810F7511D5E51FCACD5175A1CC550F83CB874A7378ACDAFE78EB2E329CD5D3C384061C4669674F1EE6B1B59FB7D91835DB7EE";
  const AES_IV  = "055772B7434A4174749AFE09B1413472";  const AES_KEY = "71CA94A64A4DEBF5566495AB03F6798F";  //-------------------------------------------------------------------------------------------------
  // convert credential from hex string to byte array  let decrypted_UTC = 0, decrpyted_buffer, aes_key2;
  // decrypt UTC    try  {        const decipher = crypto.createDecipheriv( 'aes-128-ctr', Buffer.from( AES_KEY, 'hex' ), Buffer.from( AES_IV, 'hex' ));        decrpyted_buffer = Buffer.concat( [decipher.update( credential.substr( 0, 32 ), 'hex' ), decipher.final()] );    decrypted_UTC = decrpyted_buffer.slice( 0, 8 ).readUInt32LE();    }  catch( error )  {        throw error;    }
  // verfity UTC with current time (+/-) 10sec  const current_UTC = parseInt( Date.now() / 1000 );  // get current UTC in seconds  if ( Math.abs( current_UTC - decrypted_UTC ) > 10 )  {    console.log( "Invalid UTC value has sent, deny login & all services for this client... " + Math.abs( current_UTC - decrypted_UTC ) );    return false;  }  console.log( "** UTC verified : " + decrypted_UTC + " (current = " + current_UTC + ", diff = " + Math.abs( current_UTC - decrypted_UTC ) + ")" );
  // get AES KEY2  aes_key2 = Buffer.concat( [new Uint8Array( decrpyted_buffer.slice( 0, 8 )), new Uint8Array( Buffer.from( ORG_CREDENTIAL.substring( 52, 52 + 16 ), 'hex' ))] );  for( let i = 0; i < 16; i++ )    aes_key2[i] ^= Buffer.from( AES_IV.substring( i * 2, i * 2 + 2 ), 'hex' ).readUInt8();
  // decrypt credential  let decrypted_credential = [];    try  {        const decipher = crypto.createDecipheriv( 'aes-128-ctr', aes_key2, Buffer.from( AES_IV, 'hex' ));        decrypted_credential = Buffer.concat( [decipher.update( credential.substr( 32, 256 ), 'hex' ), decipher.final()] );    }  catch( error )  {        throw error;    }
  // verfity credential with CREDENTIAL(ADC)  // return if fail  if ( ORG_CREDENTIAL.toLowerCase() != decrypted_credential.toString( 'hex' ).toLowerCase() )  {    console.log( "Invalid credential value has sent, deny login & all services for this client..." );    return false;  }
  console.log( "** Credential verified : PASS" );  return true;}
[Server Implementation Examples]
Section titled “[Server Implementation Examples]”The documentation includes server implementation examples for:
- Java - Complete implementation with AES decryption
- ASP.NET/C# - Includes custom AES CTR mode implementation
- Python - Using PyCrypto library
- Ruby - Using OpenSSL library
- C++ - Native implementation with AES library
For complete server implementation examples in these languages, please refer to the SDK files included with your download:
appsealing_credential.javaappsealing_credential.csappsealing_credential.pyappsealing_credential.rbappsealing_credential.cpp
Each implementation follows the same pattern:
- Decrypt the UTC timestamp and verify it’s within 10 seconds of current time
- Generate secondary AES key using the decrypted timestamp
- Decrypt the credential data using the secondary key
- Compare with the original credential from ADC console
Important: Replace the ORG_CREDENTIAL, AES_IV, and AES_KEY constants with values obtained from your project’s “Check Credential” function in the ADC console.